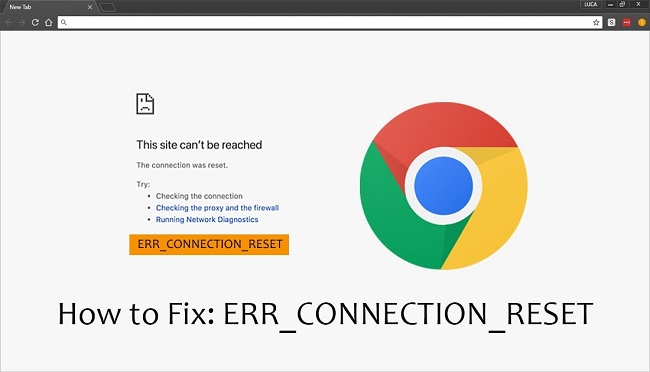
Hello Chrome users! You might aware of the very common issue “This Site Can’t Be Reached”. All we know is to restart our network connection. But restarting the network connection can’t help you all time.
There are some problems different than just a network connection, which can cause the “This Site Can’t Be Reached” problem message on your system.
Fix the Error This Site Can’t be Reached in Google Chrome
We are listing some solutions here. You can try it if your issue is not getting solved by restarting the network.
Read Also:
Fix 1 – By Resetting TCP/IP
There are few commands you have to run in the command prompt to reset TCP/IP. Follow the steps given below to reset the TCP/IP –
Step 1: At first go to the search bar and type cmd.
Step 2: Now, one window will appear in front of you, here right-click on the cmd option. Now, click on the option run as Administrator.
Step 3: Further, type the “ipconfig /release” command in Command Prompt then hit the Enter button to run the command.
Step 4: Wait! It will take some time.
Step 5: Let’s move ahead, now write “ipconfig /all” in the Command prompt and press Enter.
Step 6: Process may take some time to execute the instructions.
Step 7: Now you have to write the next instruction in the Command prompt. Write “ipconfig /flushdns”. Click on the Enter button.
Step 8: Wait! After that write the next instruction.
Step 9: Alright, type “ipconfig /renew” and click on the Enter button.
Step 10: The process may take some time, kindly wait.
Step 11: Afterwards, write the instruction “netsh int ip set dns” and hit the Enter button.
Step 12: Once the operation is complete, write the final command i.e., “netsh winsock reset”. Press the Enter button.
Step 13: Wait for the process to complete. Now, restart your system and check whether the issue gets resolve or not.
Fix 2 – Change IPv4 DNS Address
DNS Address helps you to convert your network address into an internet address. This process connects you to your request. This can also cause the issue. Changing the IPv4 DNS Address will help you. follow the steps to change the IPv4 DNS Address –
Step 1: Firstly, press the shortcut key “Windows Key + R”. One window will appear with the heading run.
Step 2: Further write the command “ncpa.cpl” and hit the ok button located below.
Step 3: After that search your internet connection and open it by double-clicking on the same.
Step 4: See, the window you are looking at in front of you is called, “Internet Connection Status window”. Here search for the tab, Properties, and click on it.
Step 5: Now, in this window go to the networking tab.
Step 6: Further, below the networking section search for the option “Internet Protocol Version 4 (TCP/IPv4)”. Now open it with a double click.
Step 7: Let’s move ahead, select the option “Use the following DNS server address” to set the address manually.
Step 8: Now write, “8.8.8.8” address in the field preferred DNS Address. And write the “8.8.4.4” address in the field Alternate DNS Address.
Step 9: Tick the checkbox “Validate settings upon exit”.
Step 10: Finally, hit the Ok button. Check your system after resetting.
Fix 3 – Check Automatically detect settings Option
This is one of the methods to resolve the issue –
Step 1: At First, use the shortcut key “Windows key + R”. It will open the run window.
Step 2: Secondly, write the command “inetcpl.cpl” and hit the ok button located below.
Step 3: Here search for the connection tab. Select the connection tab by clicking on it.
Step 4: Let’s move further, search for the LAN setting. Click on the same.
Step 5: In this window, check if “Automatically Detect Settings” is ticked or not. If the checkbox is ticked leave it as it is. And hit the ok button.
Step 6: Finally, recheck if the problem gets resolved or not.
Fix 4 – Allow DNS Prefetching
You can use your chrome browser to allow DNS Prefetching. Let’s see how to do this –
Step 1: At First open your chrome browser.
Step 2: Now, look at the top right corner. Here you will see three dots. Click on it.
Step 3: Further, search for the setting tab. And click on it.
Step 4: Alright, now click on the advance option.
Step 5: Here you have to click on the Privacy tab.
Step 6: Great! Now, tick the checkbox with the option “Use a prediction service to load pages more quickly”. It will resolve the problem quickly.
Step 7: Make sure you are using an updated version of chrome.
Fix 5 – Disabling Experimental QUIC Protocol in Chrome
Experimental QUIC Protocol is designed to provide protection. You can try to solve this issue by disabling it. Follow the steps to disable the Experimental QUIC Protocol –
Step 1: Firstly, open your chrome browser. Now, type “chrome://flags/” in the search bar. Hit the Enter button.
Step 2: Here you will see one window. Now, use the shortcut “Ctrl + F” to enable the search box.
Step 3: Alright, now type “Experimental QUIC protocol” and hit the find tab.
Step 4: Further go to the dropdown list. Choose the disable option by clicking the arrow near Default.
Step 5: Finally restart your browser. Restart your system and check if the issue gets resolve or not.
Fix 6 – Run Windows Network Diagnostic
Sometimes, this problem can cause a network issue. Any issue related to the network can be solved by running the Windows Network Diagnostic method. Use the following steps to do so –
Step 1: At first use, the shortcut key “Windows key + R” and open the run window.
Step 2: Here write the instruction “ncpa.cpl” and press the ok button.
Step 3: Further, double click on your internet connection.
Step 4: Alright, now click the Diagnose tab located below.
Step 5: This process will start the Troubleshooter.
Step 6: It will take some time. Finally, reconnect to the internet and check if the issue gets resolve or not.
Fix 7 – Restart DNS Client Service
As the DNS server responds to our search request, restarting the DNS client service will help you to solve the problem –
Step 1: At first, open the run window. For that use the shortcut “Windows + R”.
Step 2: Write the instruction “services.msc” in the search bar.
Step 3: Alright, now search for the “DNS Client” service. And click on it.
Step 4: Further, choose the option restart from the left side’s window.
Step 5: Great! This process will take some time. After that restart your system and check it.
Fix 8 – Change Value of Maximum TLS Version Enabled
More frequently google works on its TLS services to provide you better security. Updating the system to the latest version might help you. For that follow the steps given below –
Step 1: Firstly, go to your Google Chrome browser.
Step 2: Here you have to type the instruction “chrome://flags” in the search bar. Hit the Enter button.
Step 3: Further, press the shortcut key “Ctrl + F”. this instruction will help you to open the search bar in chrome.
Step 4: Alright, now type TLS in the search bar. Press Enter button.
Step 5: Here you can find the Maximum TLS version. Change the “Default” option to “TLS 1.3” to select the latest version.
Step 6: Finally, you can check the browser by restarting it.
Fix 9 – Reset Chrome Settings
If still, you are struggling with the issue, try to reset the Chrome settings. This might help you to resolve the issue. To do so follow these steps –
Step 1: At first, go to your chrome browser.
Step 2: Now type the instruction “chrome://flags/” in the search bar. Hit the Enter button.
Step 3: Alright now one window will appear. Look at the top right corner. You will see one button titled “Reset all to default”.
Step 4: Further click on that button. It will reset all settings to default mode.
Step 5: Now check the chrome browser.
Fix 10 – Reinstall Chrome
If you are done with all the solutions, this is the last option you should try according to us. We hope this will solve your issue. Follow the steps given below to reinstall Chrome –
Step 1: At first go to the settings option in your system. Search for the option “Apps and features”. You can also use an alternative. Write apps and features in a search bar and click on the Enter button.
Step 2: Further search for Google Chrome. From here you can uninstall google chrome. Click on it and choose to uninstall.
Step 3: Alright now download the latest version of Google Chrome.
Step 4: Run the Software as an administrator. And install Google Chrome in your system.
Step 5: Finally check the software by browsing something.
Read Also:
Conclusion
There are two main reasons which cause this issue. One is an error in network connection and the second is the use of an outdated version of Google Chrome. Always try to update your software to its latest version.
Even though this is a very common problem for Chromes users, it’s irritating not to get solve the issue quickly. We hope one of these solutions will help you to solve your problem.


