Steam is the most considerable platform for digital video game distribution. Originated in September 2003, steam enables automatic updates for their PC games. More than 95 million users believe this service since they provide nearby 34,000 games.
As of now, the service is available for mobile phones as well as online websites. While launching the game, there are many challenges that individuals encounter. Some of them are account get hacked, disk writes mistakes, and there are many more.
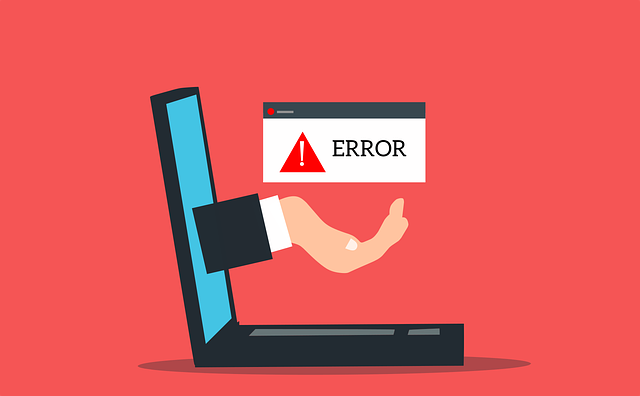
However, ‘Content File Locked’ is a common issue faced by a lot of people. Well, the worst part is that Steam does not provide solutions to the above problems.
How to Fix Steam Content File Locked Issue?
While updating a steam game, an error pops up that states ‘Content File Locked’. According to this, you cannot refresh the game on the hard disk. In the worst case, the user can not play games. The reason for this is the unavailability of the latest version of the game.
The most effortless approach to fix the problem is to uninstall the game. Later install it from the beginning. However, this technique utilizes plenty of time plus data. Still, one can not be sure about its working. Make sure that the anti-virus of your computer does not block steam.
You need to exclude it from the block list. Anyway, there are foolproof measures to resolve the concern. These are not at all complex. But remember, different solutions are suitable for varied players as there is a difference in systems configurations.
Read Also:
Solution 1: Reset Winsock
Windows Sockets API, known as Winsock, sets guidelines for windows software to access the network services like TC/IP. Winsock catalog is also responsible for the concerned issue.
According to some users, resetting the Winsock to the default setting helped them to solve the concern. To resolve the query, you can reset the Winsock to the default settings.
The subsequent steps will assist you to reset Winsock:
Step 1: Press the Windows key and R key so that the run window rises.
Step 2: Open the Command Prompt by typewriting ‘cmd’ in the Run window.
Step 3: Once the command prompt unrolls, type ‘netsh winsock reset’ and hit the Enter.
Step 4: Restart your computer and try to update the game to check whether the issue fixes or not.
Solution 2: Repair Corrupt Files
Sometimes, Corrupt files can also lead to Content file locked issues. Troubleshooting the missing/corrupt file then downloading the entire file again can help to resolve the error.
This method will assist you in searching the location of the error file. Following then, you can update the necessary files to use them again. It is the easiest way to solve the problem.
The player directly needs to search for the errors. And then delete them manually. It is the most effective method to solve the issue.
For further reference, you need to follow the steps mentioned below to repair the corrupt files.
Step 1: Firstly, exit steam. Now navigate to the Steam directory, select Logs, and click txt.
Step 2: Search for errors in the device that are present at the bottom of the file. Search a folder named root.
Step 3: After that, restart Steam, then move on to the download folder where you can update the necessary files.
Solution 3: Relocate Steam Installation and Game Filles
In case all other methods do not work, then try to relocate game files. Relocating the files can surely help to fix the issue. Firstly, you have to change the location of the steam and try to run it.
If there is an error during the process, then reinstall it again. It may sound like a robust procedure, but it is easy to follow.
Follow the below tutorial for relocating Steam Installation and Game Files.
Step 1: Firstly, click settings in Steam client.
Step 2: In Downloads, select Steam Library Folders.
Step 3: Select ‘Add Library Folder’ and create a new path to relocate the Steam. All installations will take place here.
Step 4: Now, close the Steam client and open the current Steam directory.
Step 5: Delete all the files. But, do not delete SteamApps and User Data folders.
Step 6: After that, move the above two folders to the relocated directory.
Step 7: Finally, launch and re-login the steam.
If there are any problems during the above process, use the steps written below.
Step 1: Exit the Steam and go to the location of relocated steam.
Step 2: Now, from the Directory, move the ‘SteamApps’ folder to your desktop.
Step 3: Uninstall the old steam from your PC and reinstall it to the initial selected location.
Step 4: To copy all of your game content, move the SteamApps folder to the latest Steam directory.
Step 5: Now, you can launch Steam to enter your credentials.
Step 6: Verify the integrity of the game.
Solution 4: Check Disk Scan
Corrupted game files damage the hard drive. In return, the hard drive gets slow or is not accessible.
Therefore, to solve the issue, you need to run the disk scan to eliminate the corrupted files.
This solution is easy to apply if the other solutions do not work. You have to run the command prompt and run the disk scan.
For further reference, follow the steps given below to avoid any problems.
Step 1: Click the “Windows” + “R” buttons together. A dialogue box will appear.
Step 2: Run the command prompt by typing “cmd” and press Enter.
Step 3: Type “chkdsk c: /f /r /x” in the command prompt and press Enter. Then type “Y” to confirm.
Step 4: Now, the Disk Check scan will start. Finally, verify if the problem is solved or not.
If the issue remains unsolved till now, then check out the final solution.
Solution 5: Run as Administrator
Steam needs some permissions to access files and folders of your computer. Windows blocks steam from accessing the folders if the user denies permissions.
And the message “Content File Locked” pops up. To overcome this issue, you need to run Steam as an Administrator.
Follow the steps given below to run it as an administrator.
Step 1: Right-click on the icon named Steam
Step 2: Now, click on the Properties.
Step 3: Click on the Compatibility button.
Step 4: Now, select the Run as an Administrator check box.
Step 5: Press the Apply button and then the OK button simultaneously.
Step 6: Lastly, launch Steam to check if the issue solves.
Read Also:
Conclusion
The above-told solutions are well suited to all the users for the Content file locked issue. They are easy to implement and are most effective.
As the above said, all solutions do not work for everybody as there is a difference in various systems configurations. If anyone method does not work for you, then you can try other options as well.
Find the best-suited correction according to your need. However, in case nothing works in your favor. Then, unfortunately, you will have to delete the steam and reinstall it again from scratch.
You need to catch all the steps precisely for the most reliable outcomes. To conclude, you can use any of these solutions to overcome the concerned problem.